
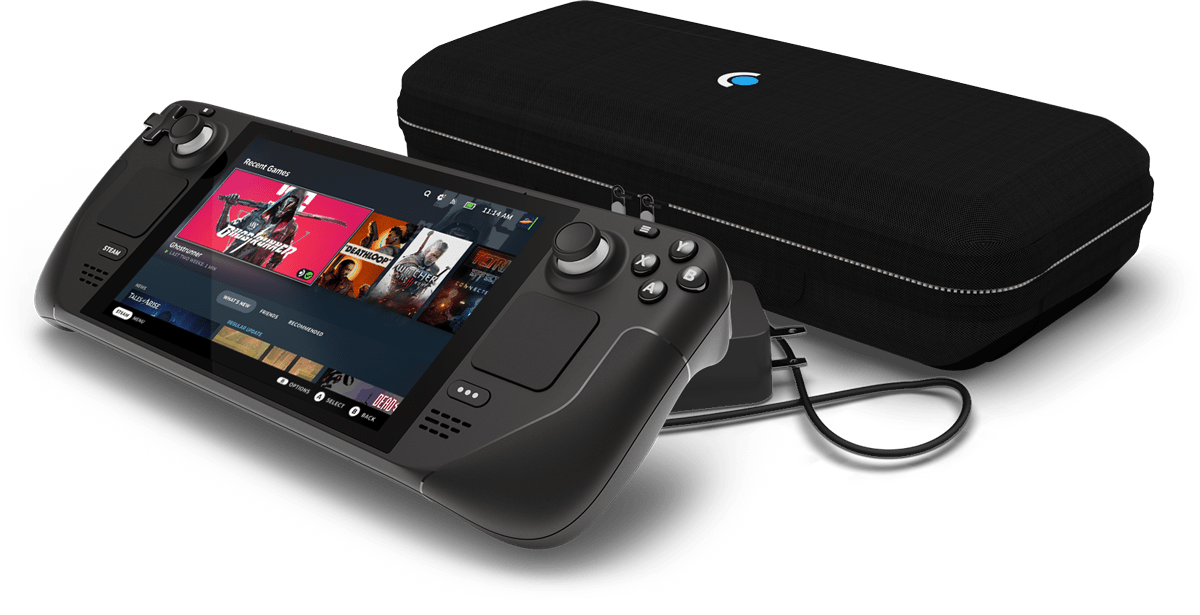
Steamdeck: The rabbithole
This blog post is kind of a full guide and links to other guides as well describes my experience with all kinds of games i tried out on the Steamdeck.

This blog post is kind of a full guide and links to other guides as well describes my experience with all kinds of games i tried out on the Steamdeck.
I will cover following topics:
Steam UI:
- Basic Steamdeck Settings
- ProtonDB and Steamdeck verified
- Decky (Desktop mode needed for install)
Powerfull desktop mode:
- Lutris
- Epic Games and GOG with Lutris
- Heroic Games Launcher (Epic Games and GOG)
- Origin, EA and Ubisoft 🤮
- EmuDeck
- Switch Emulation with EmuDeck (don´t tell anybody 🤫)
- PS2 Emulation
- Nintendo DS Emulation
- Backups
Other:
Ok so lets get started...
Basic Steamdeck Settings
Things you should do when getting your brand new and nice smelling Steamdeck
Ok so you bought a new Steamdeck, took a deep sniff of the case and now want to get started. No problem.
Login
So first thing, login with your Steam Account. If you have a quite long password like me it is useful if you install the Steam app to your smartphone and try loging in with the QR Code. If you already have a dock, you can plugin a keyboard to make typing easier.
Now you are logged in. If you want to add another account, click on your profile picture at the top right hand side and scroll down to the bottom and press logout. Then press the plus button to add another account.
Show Battery Percentage in the top Bar
Press the Steam Button on your Steamdeck.
Go to Settings (Check Family Mode)
Disable Family Mode
If you can not open the Settings when pressing the Steam Button on your Steamdeck, you have to disable Family Mode.
In the top bar, you will see a green icon with 3 people.
Press it, enter your family pin and press R2 trigger or the button.
Enable Developer Mode
If you want to install decky, then you need to enable Developer Mode.
Go to Settings (Check Family Mode).
Select System and under system settings check "Enable developer mode".
Make Deadzone smaller
The Joysticks have a big deadzone by default. You can change that via going to Settings (Check Family Mode) .
Select Controller.
Select Calibration & Advanced Settings.
Here you can change the deadzone and make it smaller.
Make shure to do it for both sticks!
Disable Vibration and Steam Haptics
It you don´t like the rumble on the trackpads you can disable it in the Settings
Go to Settings (Check Family Mode).
Select Controller.
Disable the Steam-Haptics toggle and if you want also vibration at all.
Change Startup Animation
If you want to change the startup Animation you can do that (it will cost Steam points, there is also a free way to do it)
Go to Settings (Check Family Mode).
Select Customization.
Now scroll down and select Pointshop
Here you can buy new animations with your steam points.
If you don´t want to spent them, there is also a free Decky alternative.
Downloads while playing
If you want you can enable downloads while playing
Go to Settings (Check Family Mode).
Select Downloads.
Enable Downloads while playing.
ProtonDB and Steamdeck Verified
Can i even run this game?
Ok so there are some sites you should check before installing a game.
Fist check ProtonDB. Here you can see the supported rank of the game.
Most time your game will be Gold or Platin but sometimes it won´t work at all. Especially if there is some nasty anti-cheat involved. Also check the comments!
There is also a list of verified Steamdeck games. It gives you a good overview of how well your game is supported.
Ok so you might have a gime that has a bad ProtonDB rating or is not verified.
Don´t panic!
Mayby just try it out and search the internet for fixes (reddit is a good source).
If it does not work, you can still try installing it via Lutris. If that does not work as well ... then most time you are fu**** up and can´t run that game and you should write the devs an email if they couldn´t be so polite to create damn linux support.
Decky
Nice and shiny plugins for your SteamOS
Installation
So i would not follow there docs... it seems like they are outdated. I had the best experience by following their Github repository README.
First Enable the Developer Mode.
Scroll the sidebar all the way down and click on Developer
Under Miscellaneous, enable CEF Remote Debugging
Now follow the Readme i mentioned above.
Shiny Plugins i like
- Controller Tools: Manage your Controllers on the fly
- DeckMTP: Plug in your Steamdeck via a usb cable to your pc and have access to all files
- Free Games: Notifies you of new free Epic Games games
- Game Theme Music: play the awesome theme music of your game when selecting in steam
- HLTB: Displays the time how long it takes to finish the game directly when the game is selected
- Music Controll: Controll your Music players from Spotify, Firefox, Chrome and more
- Pause Games: Automaticaly pause games when pressing the on/off button
- ProtonDB Badges: Shows the ProtonDB Badge directly when the game is selected
- Vibrant Deck: Kind of obsolete now, because Steam included this feature natively under Settings -> Display -> Advanced
- SteamGridDB: Maybe the most useful. This is really helpful if you are using external games. This plugins lets you select the Images to display and searches the internet for matching images. Really nice plugin
- Animation Changer: Select own animations without spending steam points. Sadly i never got it working.
- Decky Cloud Save: If you want to backup your game saves without a hassle. This is your way to go. You can backup to Google drive, Dropbox easy and if you dive deeper even to your Nextcloud with Webdav or anything rclone supports. Just make sure (i did that error) to name your rclone remote backend. Really important!
Bugs and Fixes
I also experiences some bugs with Decky.
Plugin is empty Bug
So if you select the decky menu with the 3-dot menu and select your plugin and it is empty. It is time for a reinstall. Just select the settings icon at the right top and select plugins. Search your plugin and press reinstall. Now it should work.
Lutris
The powertool to manage your external games
So there are many guides out there how to install Lutris so i will keep it as short as possible. Here is a good video that describes the process: https://www.youtube.com/watch?v=gVuabEckMMA
To install Lutris, go to Desktop Mode (Check Family Mode and long press the power button and select Desktop Mode)
Select the Discover store from the Task Bar (Blue Icon, Second app from left).
Type Lutris in the search bar (Don´t select a category, if nothing appears, select category gaming)
Select the first result (should have more stars than the second result)
Press Install and Launch.
Now you have Lutris and can install Games with it.
First hover over Wine (left sidebar) and select the package icon.
Here you can manage the wine versions for lutris.
Install lutris-GE-Proton-x.x.x and lutris-x.x.x (x.x.x stands for latest version number)
Install ProtonUp-QT (discover store) and select lutris and make sure they are installed there too.
Now you can go to https://lutris.net/ and select a game to install or if it is from Epic Games, Origin, EA or GOG you want to follow the next sections.
Epic Games with Lutris
More epic with Lutris
Epic Games with Lutris is very easy. Just hover over Epic Games (left sidebar) and select the account icon.
Now you login with your Epic Games credentials and voila you are able to install Epic Games Games via Lutris.
Same thing for GOG.
So maybe you are asking why using Lutris over Heroic Games launcher?
Yeah thats a good question! So with Lutris i think you have more options when something does not work to tweak it so it works. Heroic Games Launcher is more user friendly and provides you with more information before installation, but and this is a big but it can´t handle Ubisoft games with their own launcher. So i prefer Lutris. If you do not play Ubisoft games. Congrats! Try Heroic Games launcher out :)
I personally did not got Epic Games games working, that require Ubisoft authentication. I got in a "Link your account"-Loop where Epic Games, tells me at the end, that my Ubisoft Account is allready linked, but only provides me with the button to start the linking process again.
I personally decided to never buy any Game from Ubisoft again.
Ah and don´t forget the right click on your Lutris games to add them to Steam
Heroic Games Launcher
Nice and shiny
Heroic Games Launcher is awesome for beginners but hard to fix games if they don´t work. So to download it, go to Discover Store (blue icon in the task bar) and just search for Heroic Games Launcher
I think Heroic Games Launcher has a great user experience for beginners so try it out but don´t try ubisoft games. They will not work.
Most time it should be fine to use the proton wine version already installed. If not you can try different wine versions via the Wine Manager. Just don´t forget to change the version at the game settings too.
I went back using Heroic Games Launcher because i didn´t get Ubisoft games with Epic Games to work.
Origin EA and Ubisoft
Do you really need it?
Ok so with Origin and EA i suggest using Lutris again. Just login with your EA account there and try to play games with that.
If you try to play Ubisoft games you bought via Epic Games checkout the Epic Games with Lutris section i mentioned the problems there
I can not suggest installing the Origin Launcher or the EA App via Lutris.
Do this only if it is your last resort. Sometimes it works. Sometimes not.
EmuDeck
A manager for all your emulators. You will love it.
EmuDeck is great! It provides you with a simple application managing all your emulators and roms.
So first follow the Installation Guide on their website (it is really good, even with video, so just follow it): https://www.emudeck.com/#how_to_install
After you have setup everything you can set up your emulators.
Just check EmuDeck sometimes to keep them updated or to move your games from one deck to another.
There is even Cloud Backup!
Add your games to steam
To add all games you have installed with EmuDeck to Steam open the Steam Rom Manager Application in Desktop Mode.
Toggle the Emulators you want. Press Preview -> Parse -> Save to Steam
Switch Emulation
The szechuan sauce of the Steamdeck
So ähm switch emulation. Its, kinda painfull but it works, sometimes ...
This i not so trivial, so just do it if you really want it.
The Emulator name is yuzu. First start up Yuzu and click ok on the encryption message and configure your language under Emulation -> Configure
If you installed Yuzu (Nintendo Switch) via Emudeck there should already be a directory in the Application configured.
Ingredients you will need:
- A rom file (the base file is most time a *.xci and dlc and update files are *.nsp files)
- The firmware at a specific version (https://prodkeys.net/, https://prodkeys.co/switch-firmwares/, https://oldroms.com/switch-prod-keys-and-title-keys/, https://eggnsemulator.com/download-prod-keys-title-keys-for-ryujinx-yuzu-skyline-and-other-emulators/)
- The keys for the matching firmware (https://prodkeys.net/, https://prodkeys.co/switch-firmwares/, https://oldroms.com/switch-prod-keys-and-title-keys/, https://eggnsemulator.com/download-prod-keys-title-keys-for-ryujinx-yuzu-skyline-and-other-emulators/)
Firmware and prod keys
Download the Firmware and the prod keys.
Now head over to the folder with Dolphin (the file manager, Strg+E) where EmuDeck installed everything. If you selected your internal drive go to /home/deck/Emulation and if you selected the SD card select the SD card in Dolphin and select the Emulation folder.
Now inside the Emulation folder there is a bios folder. Open it.
Now select the yuzu folder inside the bios folder.
Paste the firmware you downloaded into the firmware folder and the keys into the keys folder.
Now open Yuzu again and the message with the encryption should not pop up. If it does you done something wrong.
Install game
Now Select File -> Open yuzu folder now it should open Dolphin again and here should be a folder named roms. Paste your *.xci file here
Close Yuzu and open it again.
Now just double click the game and it should open. Pray for it.
/home/deck/Emulation/bios/yuzu/firmware
/home/deck/Emulation/bios/yuzu/keys
/home/deck/Emulation/roms/switch
Install updates and DLCs
To install them select File -> Install file to nand and select your *.nsp file.
After sucessfull install you should see 1 DLC or Update(x.x.x) in the game table.
Controller Mappings
Ähm yeah thats a kind of awefull thing.
If you need to change the mappings or your game does not recognice your mappings press the ESC button (yeah you need a keyboard or SteamLink) and select Emulation -> Configure -> Controller and there you can configure the controlls for each player. Sometimes you need to select the SteamControls 0 controller if your Steamdeck controller does not gets recognized, because Any does not work sometimes.
My Game only shows black screen
Yeah you need to restart your Steamdeck. Sometimes if it does not help, switch to Desktop Mode and start the game via Yuzu in desktop mode, close it and switch back to Game Mode and try it again.
PS2 Emulation
Far easier than Switch emulation and less buggy
Ingredients:
- The bios (https://www.retrostic.com/bios/pcsx2-playstation-2)
- The iso of the game
There is a good guide here: https://www.youtube.com/watch?v=LI7957GoM3k
Now head over to the folder with Dolphin (the file manager, Strg+E) where EmuDeck installed everything. If you selected your internal drive go to /home/deck/Emulation and if you selected the SD card select the SD card in Dolphin and select the Emulation folder.
Now inside the Emulation folder there is a bios folder. Open it and paste all files of the bios directly in here.
Now open the Emulation folder again and inside there is a roms folder.
Inside this folder there is a ps2 folder.
Now just paste the iso here.
/home/deck/Emulation/bios
/home/deck/Emulation/roms/ps2
You can open the App PCSX2 to check if your games are correctly imported.
Nintendo DS Emulation
Good old times baby!
Nintendo DS Emulation is more simple in comparision to Nintendo Switch emulation, but requires a bios too.
Ingredients:
- The bios: https://www.retrostic.com/bios/nintendo-ds
- Your *.nds file of the game
Now head over to the folder with Dolphin (the file manager, Strg+E) where EmuDeck installed everything. If you selected your internal drive go to /home/deck/Emulation and if you selected the SD card select the SD card in Dolphin and select the Emulation folder.
Now inside the Emulation folder there is a bios folder. Open it and paste all files of the bios directly in here.
Now open the Emulation folder again and inside there is a roms folder.
Inside this folder there is a nds folder.
Now just paste the *.nds file here.
/home/deck/Emulation/bios
/home/deck/Emulation/roms/nds
You can open the App melonDS (Nintendo DS) to check if your games are correctly imported.
To change the Language, open melonDS and select Config -> Firmware Settings -> Override Settings from external firmware -> Language
Gameboy Emulation with Retroarch
Retro is awesome!
To emulate Gameboy games, there is an Application called RetroArch (Retro Systems) installed with Emudeck.
For me it wasn´t quite user friendly, but if you figure out how it works its quite easy.
So first you have to check you game files for the version of the gameboy they where made for. Mine are *.gba files so they are for the mGBA Gameboy.
Now head over to the folder with Dolphin (the file manager, Strg+E) where EmuDeck installed everything. If you selected your internal drive go to /home/deck/Emulation and if you selected the SD card select the SD card in Dolphin and select the Emulation folder.
Now inside the Emulation folder there is a roms folder.
Inside this folder there is a gba folder (check the naming with your file endings).
Now just simply paste your *.gba files here and just open the Steam Rom Manager again to Add your games to steam.
You should now be able to open and play the games from Steam.
To change the ingame language, open a game and press L3+R3 and search the settings here for language configuration. You need to save the configuration (there is a "save config" button)! Then restart the game and now your game should be in the desired language.
/home/deck/Emulation/roms/gba
Backups
You really should do backups
Ok so backups is not that easy. It`s kinda the same like on Desktop.
You can use a service like Backblaze for example. It has Linux Support and you pay 7€/month for unlimited storage.
Or you can use the Decky Cloud Save Plugin to backup to Google Drive and Dropbox.
I am using https://syncthing.net/. There is a Syncthing GTK App on the Discover Store.
You can use that to sync files with another Syncthing instance.
Send files to the Steamdeck
I want files. Give me more files!
There is an application on the discover store named Riftshare. It allows you to use the magic-wormhole package with a UI.
So how do you send files to your steamdeck?
Install magic-wormhole on your PC.
Now open Riftshare on your steamdeck.
Execute following command on your PC:
wormhole send file.txt
it will give you a short 3-word code.
Select recieve Enter that code into Riftshare and press the button to recieve.
The file will land in your downloads folder.
Reinstalling SteamOS
I broke something. Let's reinstall
Flash it via Balena Etcher to a USB and put it into your Steamdeck.
Now shutdown your Steamdeck.
Press the volume minus button and hold it and short press the on button then after one second release the volume minus button.
Now you should be able to select the USB Stick you flashed.
It can take a while and should boot into a KDE Environment like in Desktop Mode.
Now execute Reimage Steam Deck and wait until finish.
Then reboot.
For me after the reboot the controller did not work. So you have to login with touchscreen only.
After login it will install updates and after another reboot the controller should work.